
Guide: Sending SMS from Google Sheets with Sheet Gurus SMS [Updated 2025]


Updated 6/13/2025
Sheet Gurus SMS empowers you to send personalized, bulk SMS messages directly from Google Sheets™, streamlining your communication workflow. Whether you’re managing marketing campaigns, appointment reminders, or internal notifications, this guide will walk you through the process. Click here and install the application by clicking the “Install” button near the top and the extension will automatically be added to your Extensions toolbar inside of Google Sheets.
🚀 How to Start Sending SMS from Google Sheets
To start sending text messages from a spreadsheet simply create a new sheet and in the first row put your data headers for the information you have relating to your recipients. You can put anything you want up here, as long as 1 column of your data contains only the phone number of each recipient, 1 per row. Make sure the phone number does not include any hyphens, dashes, parentheses, or spaces. See below for an example.
This is how your data should look when using Sheet Gurus SMS, with the first row being headers, and all subsequent rows containing recipient data. Once you’ve got your data setup in your sheet, you are only a couple button clicks away from sending out dynamic text messages directly from inside your Google Sheet!
How to Compose a SMS from Google Sheets
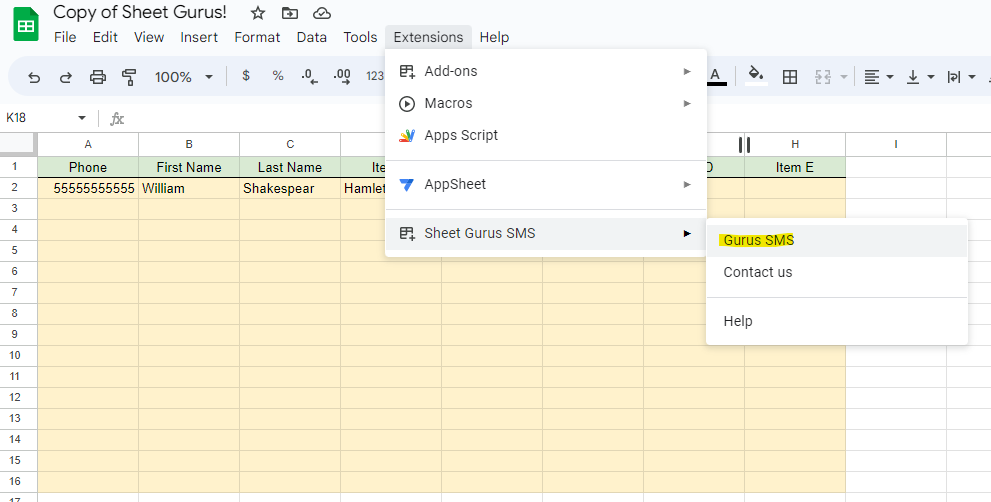
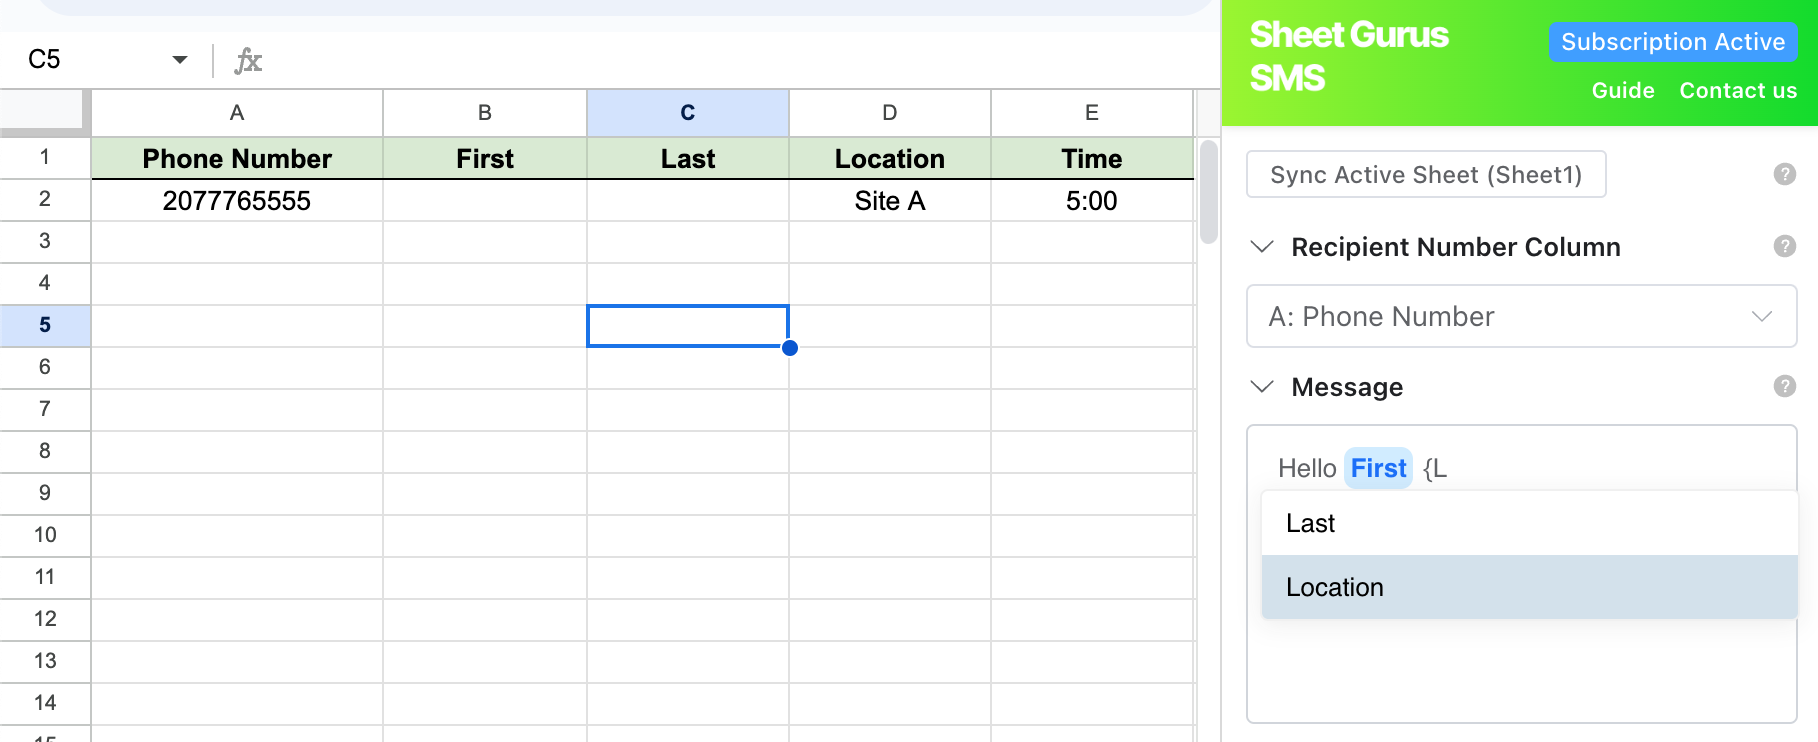
First open the extension by clicking Extensions -> Sheet Gurus SMS -> Gurus SMS. Then in the sidebar, enter the column which lists your phone numbers for your recipients. In the above image, that would be Column A.
Below that you can write the message you’d like to send to everyone. Sheet Gurus SMS allows you to create custom variables in your message that will be automatically substituted per-recipient to their specific data.
Note the special {curly brace} syntax found in the message. This is how you insert custom variables, which are described below in more detail. So by surrounding a certain word or phrase with { } you are able to then substitute it with a row-specific value.
Note that the {variable} names you declared should be highlighted in blue. If they aren’t make sure you are using the { }, and not [ ] or ( ). Below your message you are now able to dynamically change the content of each message by selecting which column you’d like to replace your placeholder variables with in your message.
Make sure to take one more look at your message preview below the message box before clicking send. What you see up there is exactly what your recipient will receive, so all of your variables should be automatically substituted in for you.
📅 How to Schedule a SMS from Google Sheets to be sent later
With Sheet Gurus SMS, you can effortlessly schedule batches of text messages to be sent at a future date and time—all within your Google Sheets™ environment.
- Open the Add-On: Navigate to Extensions > Sheet Gurus SMS > Gurus SMS to launch the sidebar.
- Compose Your Message: Craft your SMS, utilizing dynamic variables like {Name} or {Appointment Date} to personalize each message based on your spreadsheet data.
- Enable Scheduling: At the bottom of the sidebar, select the “Schedule for Later” option.
- Set Date and Time: Choose a specific date and time for your messages to be sent—starting from as soon as 15 minutes up to 30 days in advance.

This feature is ideal for:
- Sending timely reminders.
- Coordinating marketing campaigns.
- Automating routine notifications.
Deliverability & Inbox
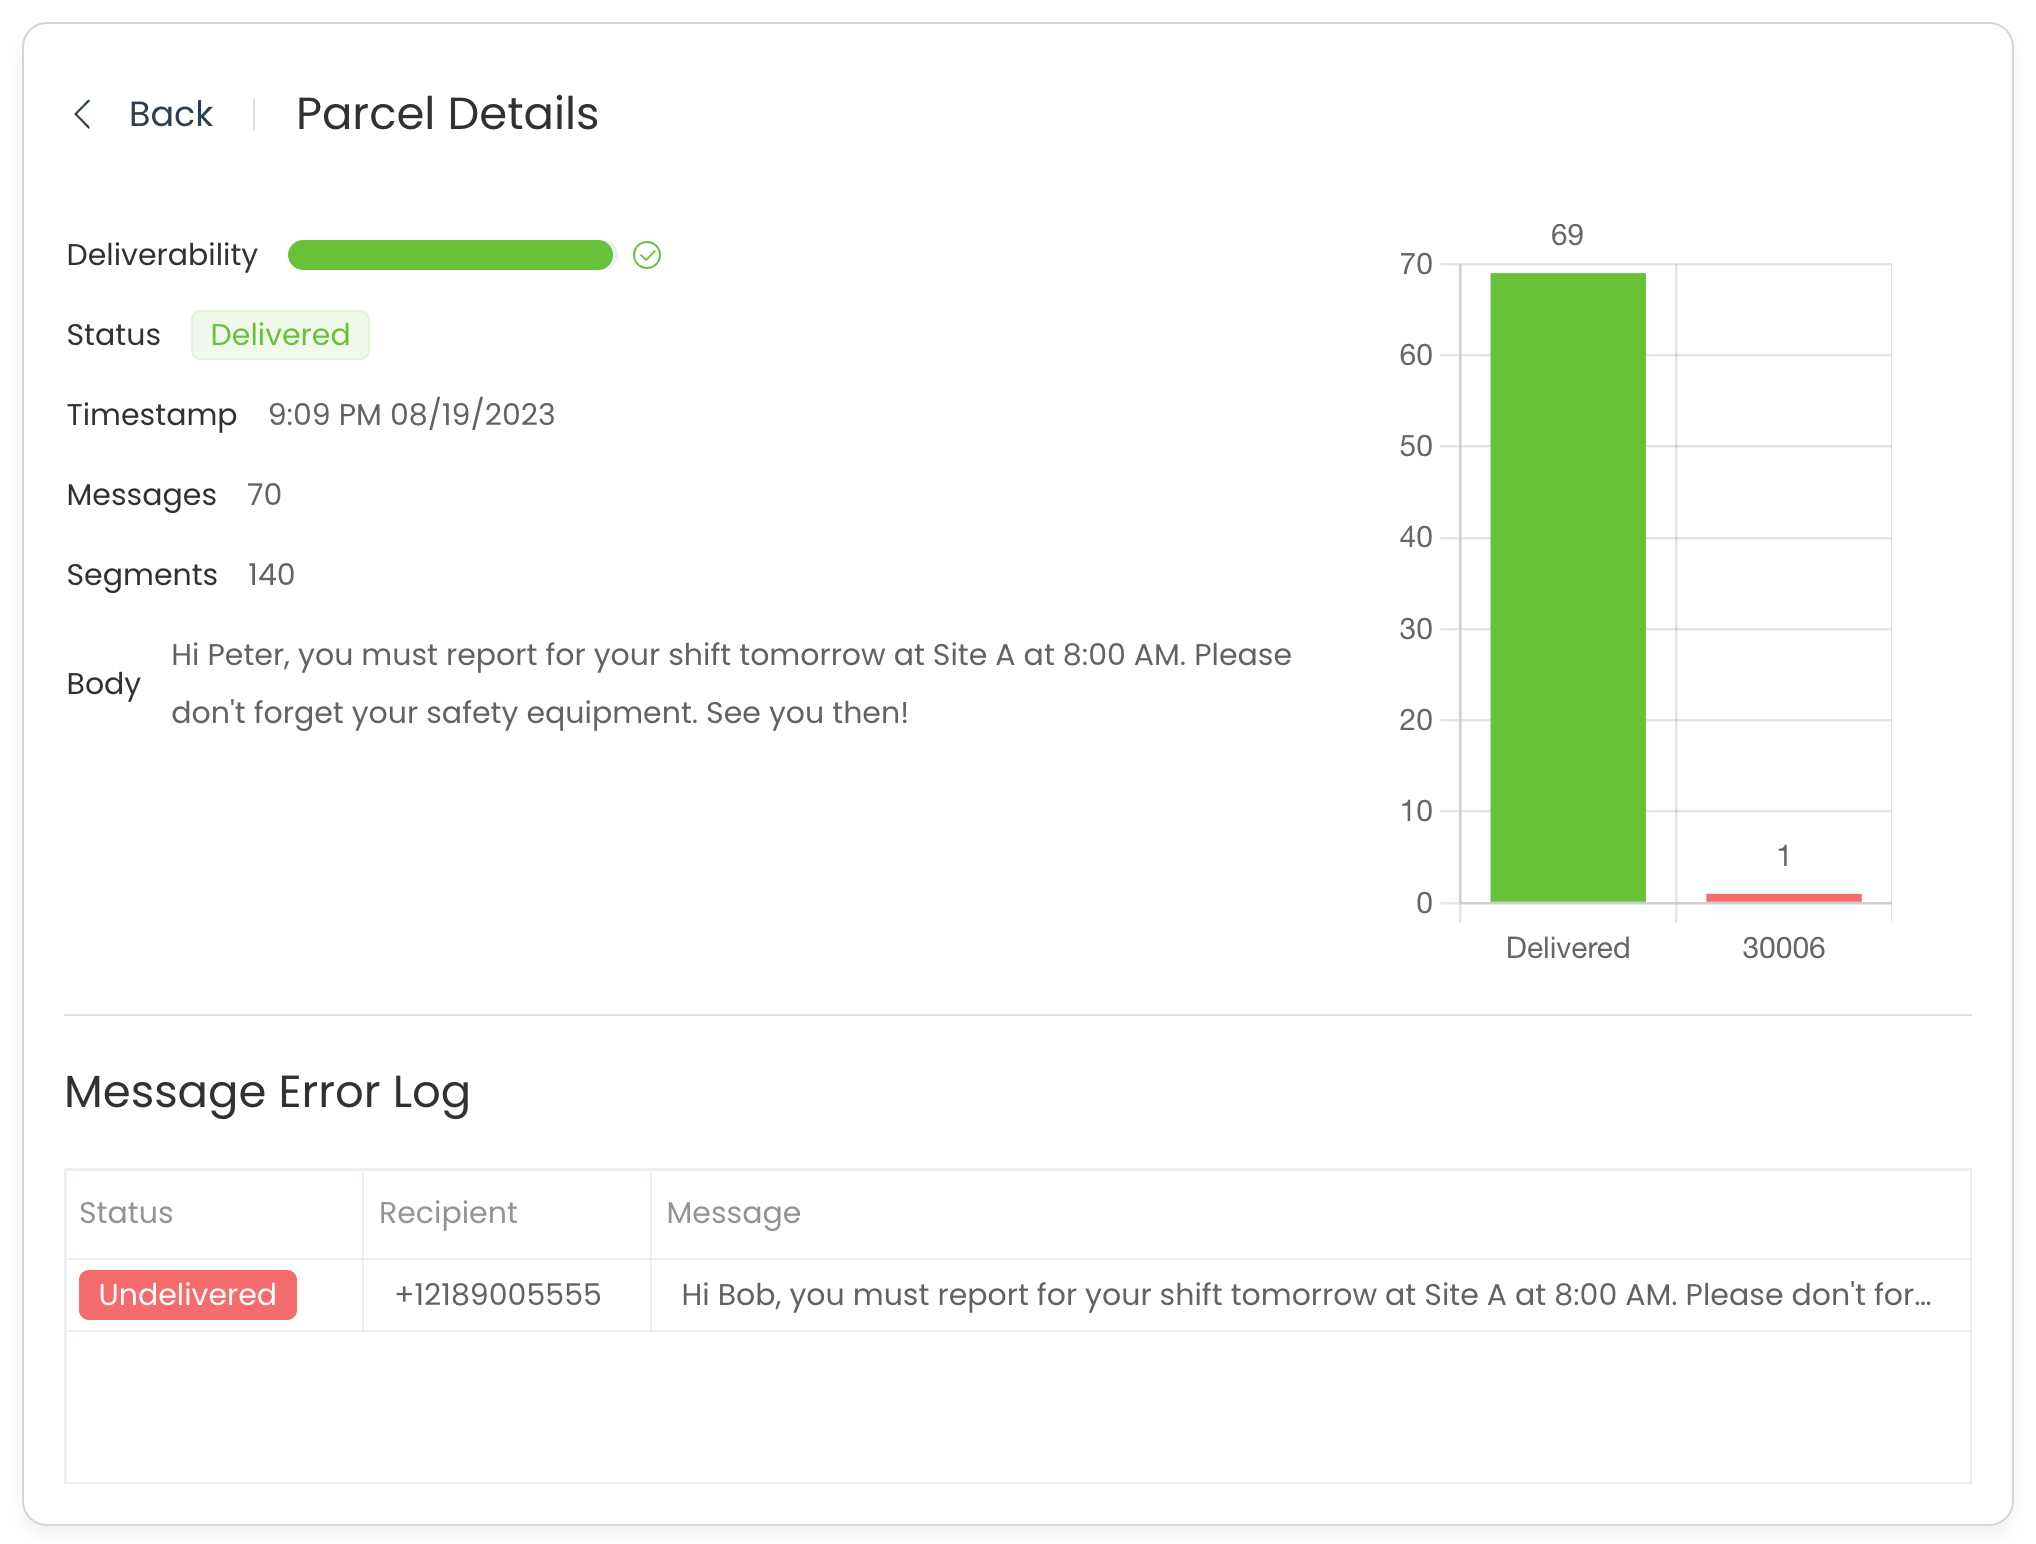
After you’ve sent your first batch of messages (internally we call it a parcel) be sure to check out our newest features - real time inbox and deliverability insights.
📊 Monitoring and Managing Messages
This will show you what messages were delivered and which ones didn’t (and why!). To see a list of common error codes, and what they mean, check out our blog post on error codes here.
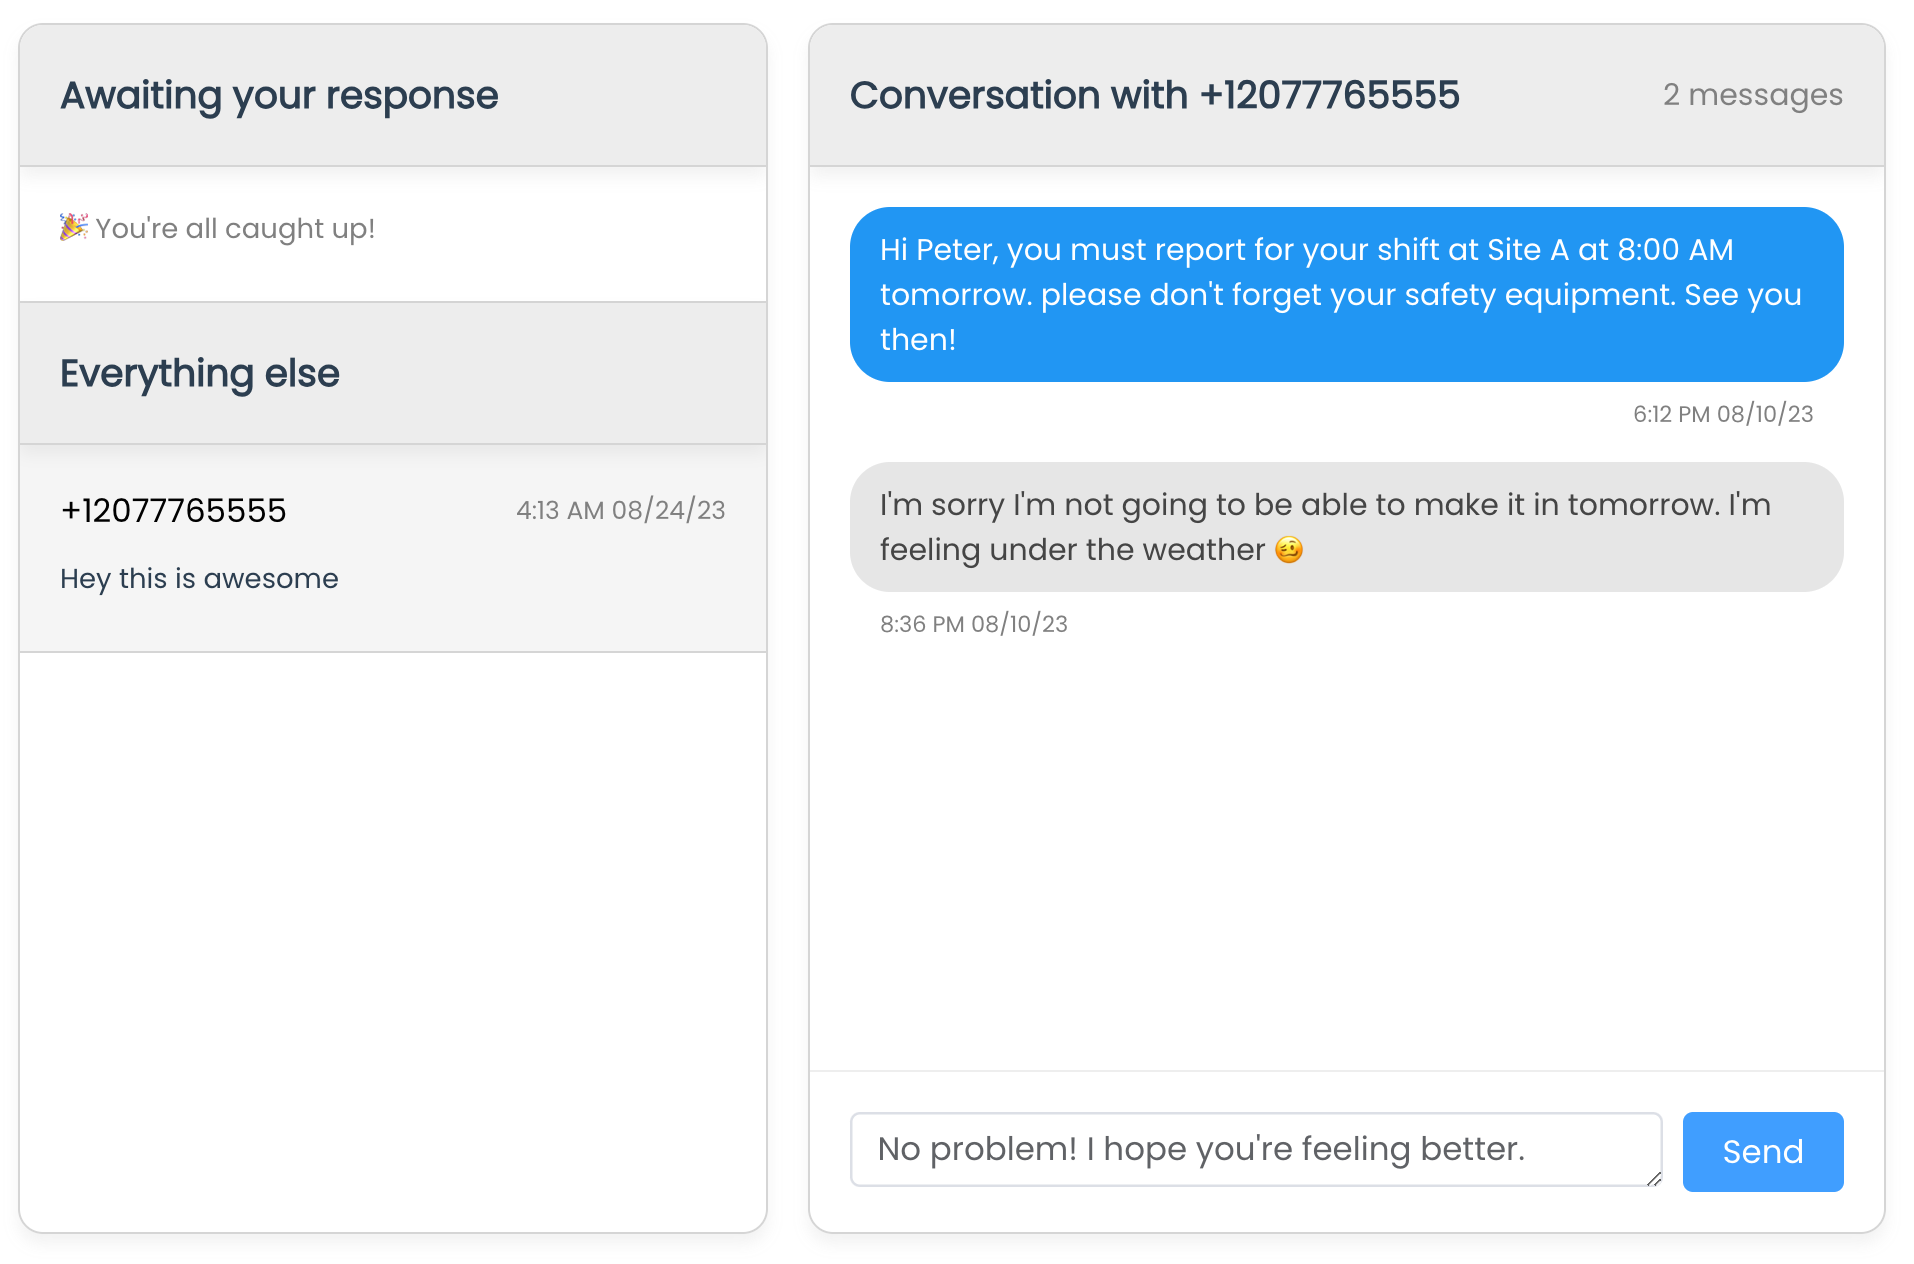
Real Time Inbox
The inbox feature is also a great way to easily respond to inbound messages, allowing you to send responses directly messages through our web app. While Google Sheets is great to send bulk messages, sending one off responses is more difficult. That’s why we created the inbox features. It’s also available on mobile — allowing you to respond to messages on the go.
Mobile Optimized
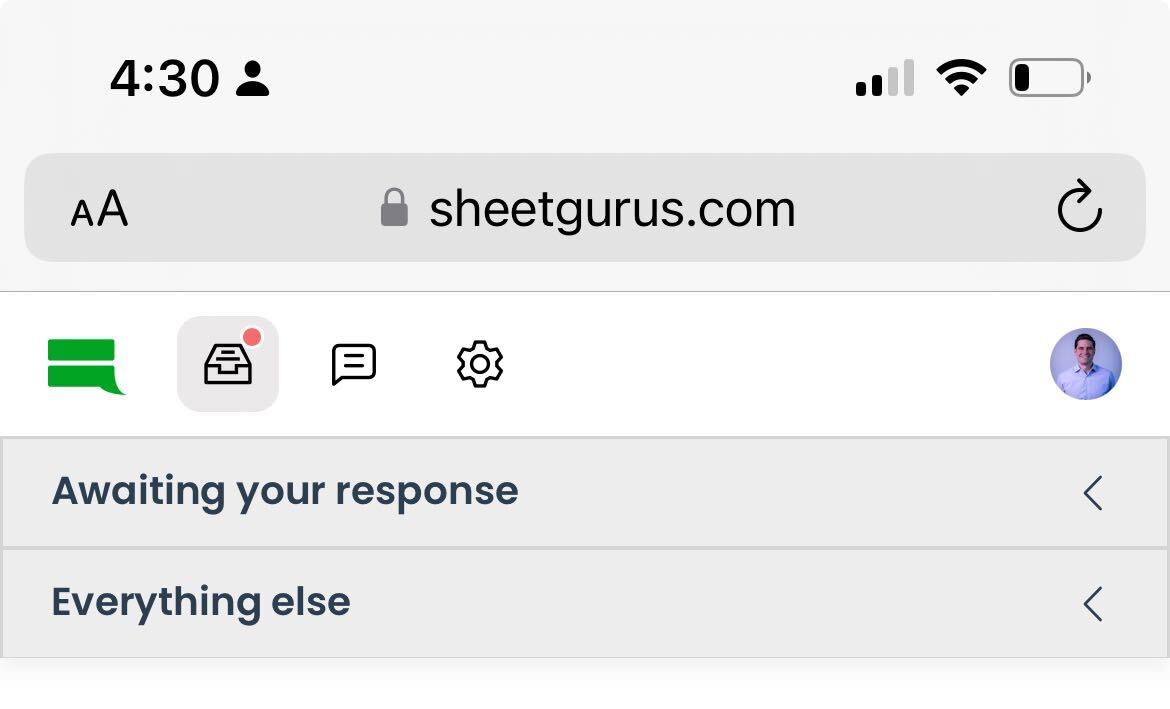
After sending bulk texts from Google Sheets you’ll often have to manage responses on the go. Thankfully, the Sheet Gurus website is mobile optimized. This allows you to access both the deliverability and Inbox features from your phone! Sheet Gurus frees you up from being stuck behind your computer.
Why Text Messaging?
For marketers, while email puts up a decent 22% open rate, it pales in comparison to text messages which have a 98% open rate across all demographics. So why aren’t more businesses taking advantage of this enormously successful avenue of disseminating information? Well because generally it has been a pain to work with, until now.
Whether you’re an executive managing a team, a marketer contacting potential clients, or a business owner interfacing with customers. Being able to easily and effectively reach out to others is an integral part of every business and organization. People are often too slow to check email for urgent matters, or may not open them at all.
Why Sheet Gurus?
Sheet Gurus is the simplest and easiest to use bulk texting solution on the market. We’ve gone to great lengths to make the onboarding process easy and simple. We have an industry leading low monthly fee of just $8 and charge just $0.04 per segment. If you’d like to see how Sheet Gurus compares to other bulk texting solutions, see our Buyers Guide here.
Why Use a Google Sheets Extension?
You store tremendous amounts of data in Google Sheets. Why waste time with non-integrated vendors. It takes too much time to download files, export into another software system, create contacts, and then finally type your message. Skip all that! Try Sheet Gurus, who is already deeply embedded into Google Sheets. We are proud to be the simplest and easiest to use Google Sheets texting solution.